Month: June 2025

  • First cuts ✂️

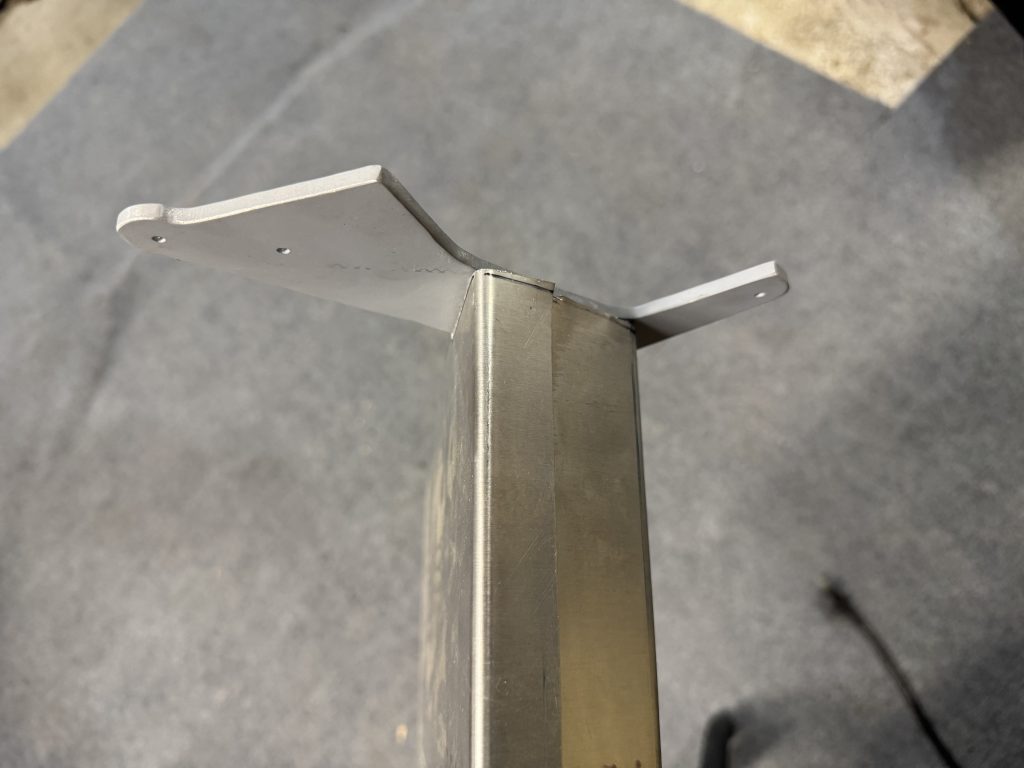
    The rudder control horn was already completed, although the 5.2° bend is a little off. Since it is already riveted together and primed I’m just going to use it.

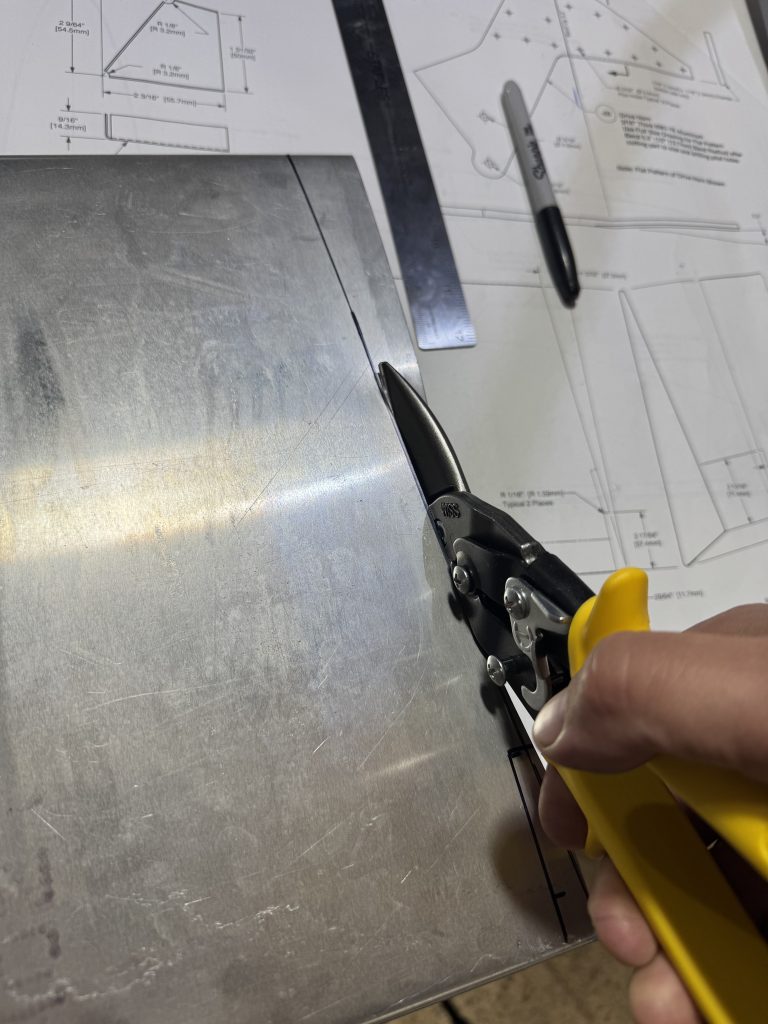
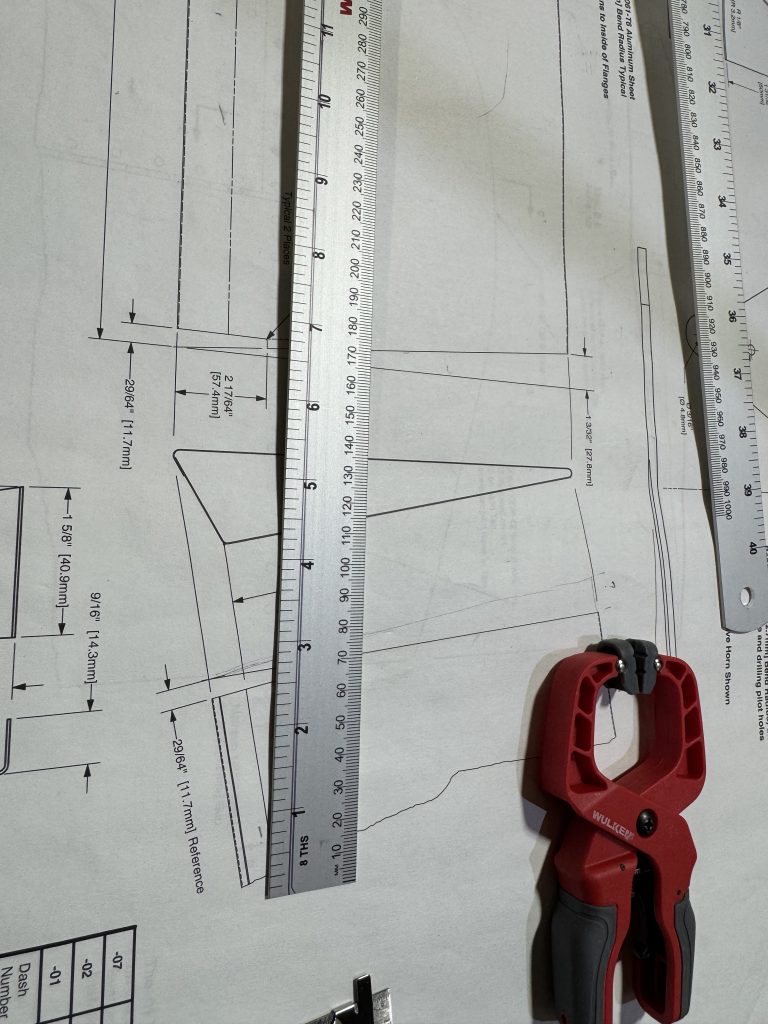
    I transferred the end cuts to the control surface stock. Since the stock is a few inches too long, if I mess up I have enough material to try again. Drawing a straight line on a curved surface, then drawing that same line on the opposite surface is a little tricky!

    Looks alright I think!

    Some of the edges were a little wonky however and I decided to do it again to improve my technique. First, I drew better cut lines using an Ultra-Fine point sharpie.

    Then instead of using shears, I made a rough cut on the bandsaw

    then got in close with the shears, and used a coarse file to finish and make the edge straight. I think next time I will try a burr.

    Fitting the control horn straight was a little tricky. I drilled one rivet when it was mostly square, then drilled another after squaring it up.

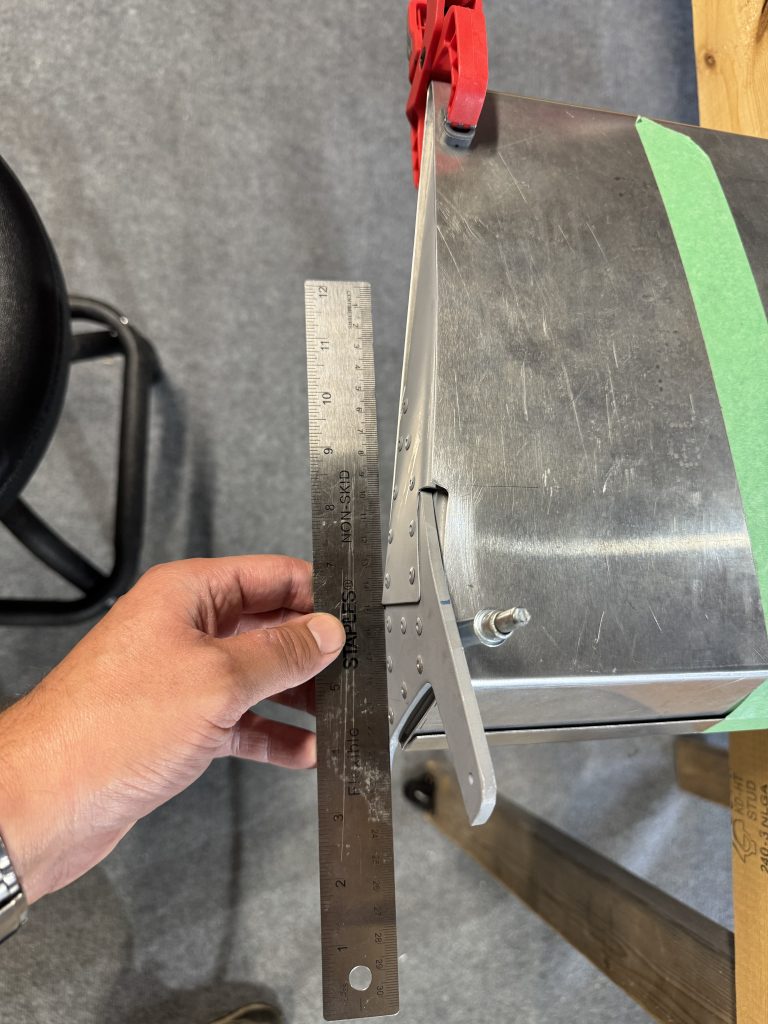
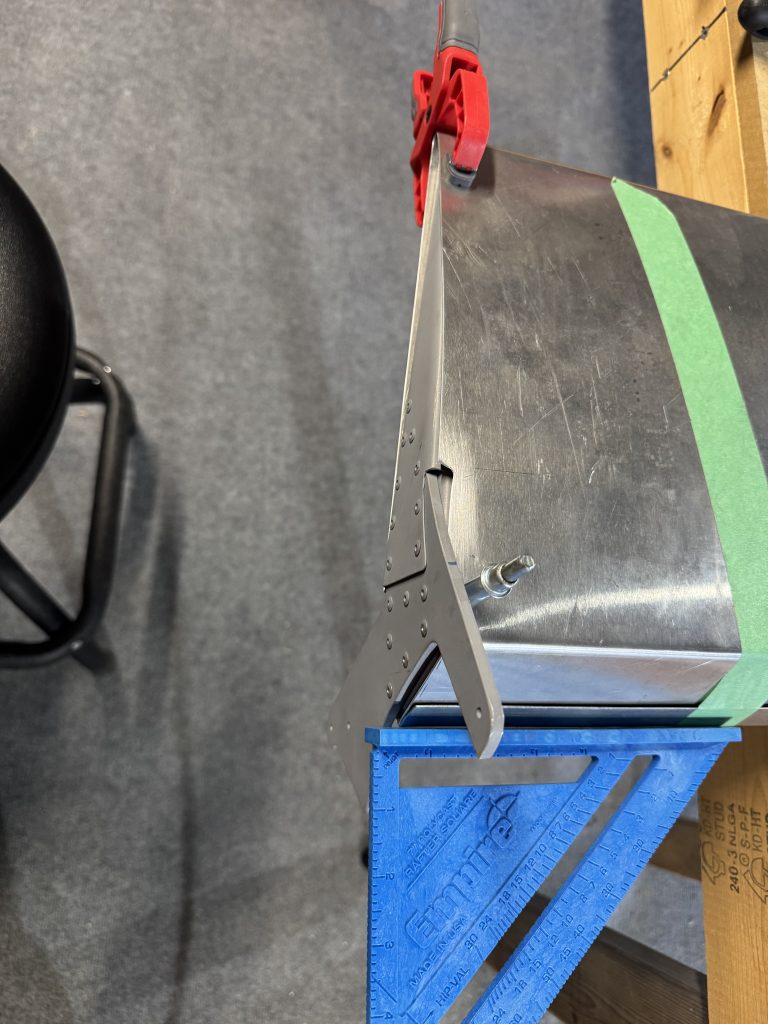
    By holding the straightedge and square together at the same time, I could get the horn really straight.

    I will have to drill a bunch of rivet lines and hinges. A rivet spacer on Spruce is $90! I’m building an airplane, not a public art installation. With a $3 aluminum ruler from Canac, I drilled holes precisely where they needed to be, and can make a few of them, as Jeff shows on his blog.

    My first line was a little off! Turns out it was the clamp that added a bit of tension. Clamping from the end and not the side solved the problem.


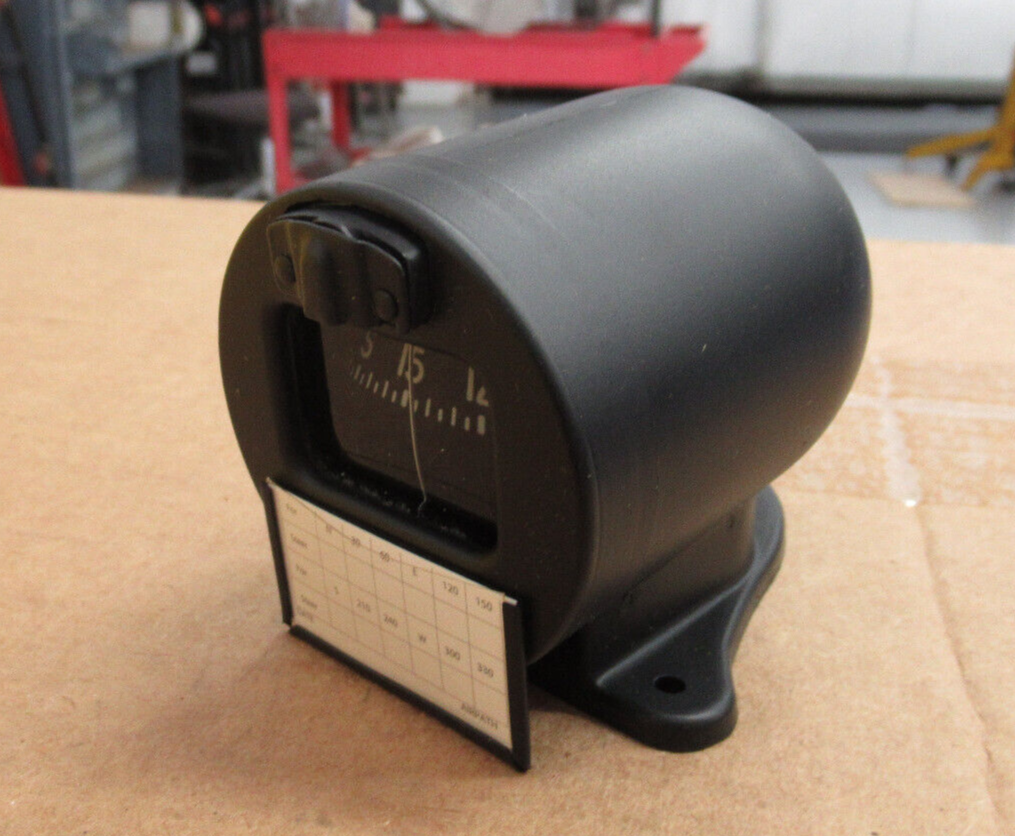
    A mechanical compass is a requirement in Canada. An Airpath pedestal compass is over $500, plus tax! Someone was selling an illuminated model on eBay for $250, so I snagged it. Unlike electronic instruments, a compass is very unlikely to be outdated by the time I need it.

  • Taking stock

    Now that I have a place to work, I am beginning to assess the parts of the build already done and prepare for the first major milestone. Canadian rules require an inspection of all areas that will be closed-off for the final inspection, and at the same time for the assembly to be as advanced as possible. This complicates planning as pretty much all the metal parts have to be in a mostly-finished state.

    The first builder was in USA which does not have this pre-cover inspection requirement, and consequently the airplane was not built with inspection in mind. The second builder, James, was in Canada and had do undo some of the work of the first builder to prepare for the inspection.

    The left surface of the vertical stabilizer had its rivets drilled out so the inside could be inspected. Opening it up reveals a job well done. The skin edges were rather rough and I busted my first knuckle on it, so the plane drew first blood on day 1.

    The fibreglass tip had been riveted on. Talking to my local MD-RA delegate Mathieu, they are prohibited from using borescopes to perform inspections as it overly complicates matters if a build fails inspection. The tip will have to come off.

    There is a spar web and attach angle that should be on the tail. I found the attach angle in a parts box, and found the web already riveted to the fuselage. The lower attach angle was floating around where it will eventually be attached.

    Taking apart the horizontal stabilizer, I also found a nice quality of build. There was just one curiosity: the left and right horizontal stabilizer skins had been mis-labelled by a previous builder, with right and left swapped. They had been correctly installed so I am not sure how this could have happened. I will have to keep an eye out for similar errors.

    As the horizontal stabilizer tips had been cut to size I test-fit one just for fun. The tips and ribs were correctly labelled left and right. Curiously, I found two complete sets of fibreglass tips and tip ribs in the kit.

    Finally, the trim tab had not been fabricated, and the nutplate had not been attached to the elevator control horn. The trim tab can wait, but the nutplate has to be done before elevator closure.

    The plans call for an AN366F-832 flush nylock nutplate which Aircraft Spruce doesn’t have; they do have AN366F-832A which is $15.50 at Aircraft Spruce and backordered, and I am not sure what the difference is. The hardware list calls for 4 pieces.

    Digging a little deeper, AN366 was superseded by MS21047F and AN366F-832 can be substituted with MS21047-08, which are $1 and stocked (although they only have the variant with dry lube).

    These tables were from a document found on EverySpec, which I had never heard of. What a useful resource!

    I also have to wonder why the plans ask for a SSC-34 rivet here, which is a non-stainless steel 3/32″ flush pop rivet.

    Searching for SSC-34 on Aircraft Spruce produces no results, but they do have the rivet (Part# 04-02338 “CHERRY RIVET SSC-34”). Maybe their search feature does not like the dash.

    Last, the local metal shop does not have 0.025″ sheet aluminum, which I will need for the seat pan. Spruce has this of course, so I will be planning for a big order…

  • More workshop progress

    With the second floor of the garage cleared out, I could start storing parts up there.

    Most of the parts. The canopy is suspended so it doesn’t get scratched.

    With some space freed up, I can finally see the airplane!

    I modelled my half of the garage (Molie gets her half too) in Sweet Home 3D to help me plan it out.

    Sonex recommends a 4 x 12′ (1.2 x 3.6 m) work table, but I will try a 4 x 8′ (1.2 x 4.2 m) table for now. The work benches along the walls will hold power tools and pegboard.

    The garage is unheated so I picked up this nifty Dantherm VA-M35 military diesel tent heater that is rated at 35 kW, much more power than even the main furnace for the house! It should help keep the work area comfortable even in winter when it hits -25 ℃.

    It was just $200! The fan motor was seized however so I removed it and took it to a local electric motor shop. Otherwise it works quite well, and because it was made in Denmark it even has metric hardware.

    I was unhappy with the “dehumidifier” as the temperature outside increased, so picked up a very cheap peltier dehumidifier. I would not want to use one of these things to dehumidify a room, but it seems to work well for a small box. It has some digital electronics inside and a 5V supply so I should be able to make it controllable with esphome without much effort, but for now it just runs all the time.

    Engine humidity before and after changing to the peltier dehumidifier.
    The humidifier next to the engine.

    Sifting through the paperwork that came with the plane, I found notes from the previous owner James. He had invested 341 hours over about 2 ¼ years before selling it. Quite a bit of time was spent undoing some of the unsatisfactory work done by the first owner.

    Ending this post with a cat picture.