Category: Workshop

  • More workshop progress

    With the second floor of the garage cleared out, I could start storing parts up there.

    Most of the parts. The canopy is suspended so it doesn’t get scratched.

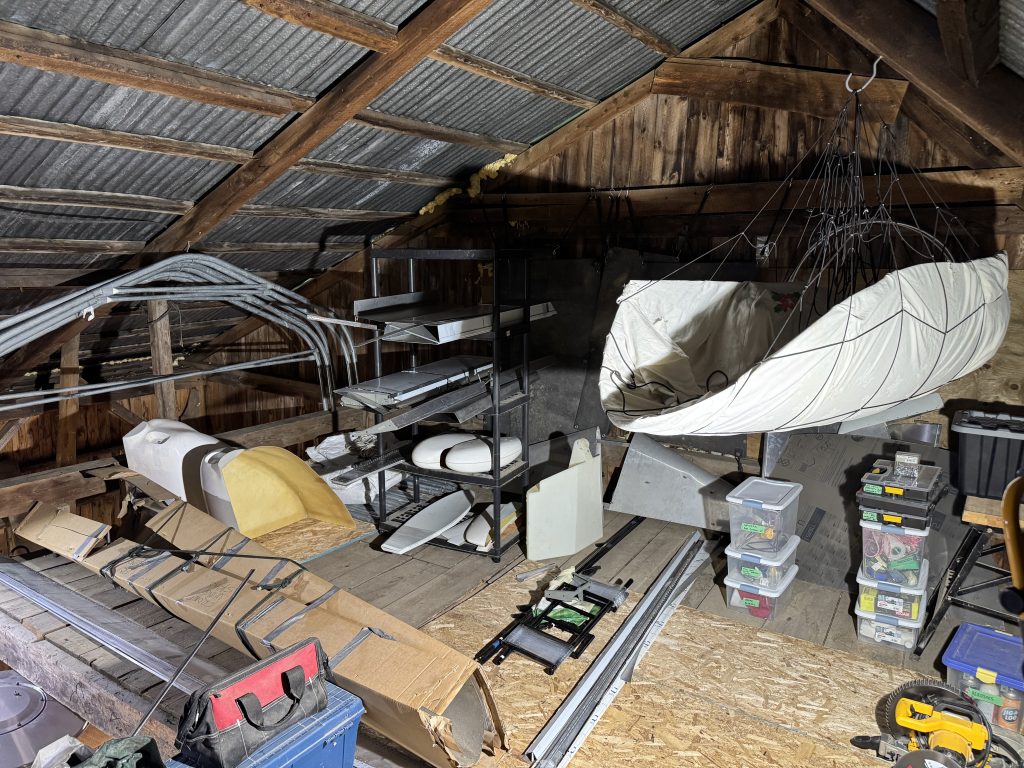
    With some space freed up, I can finally see the airplane!

    I modelled my half of the garage (Molie gets her half too) in Sweet Home 3D to help me plan it out.

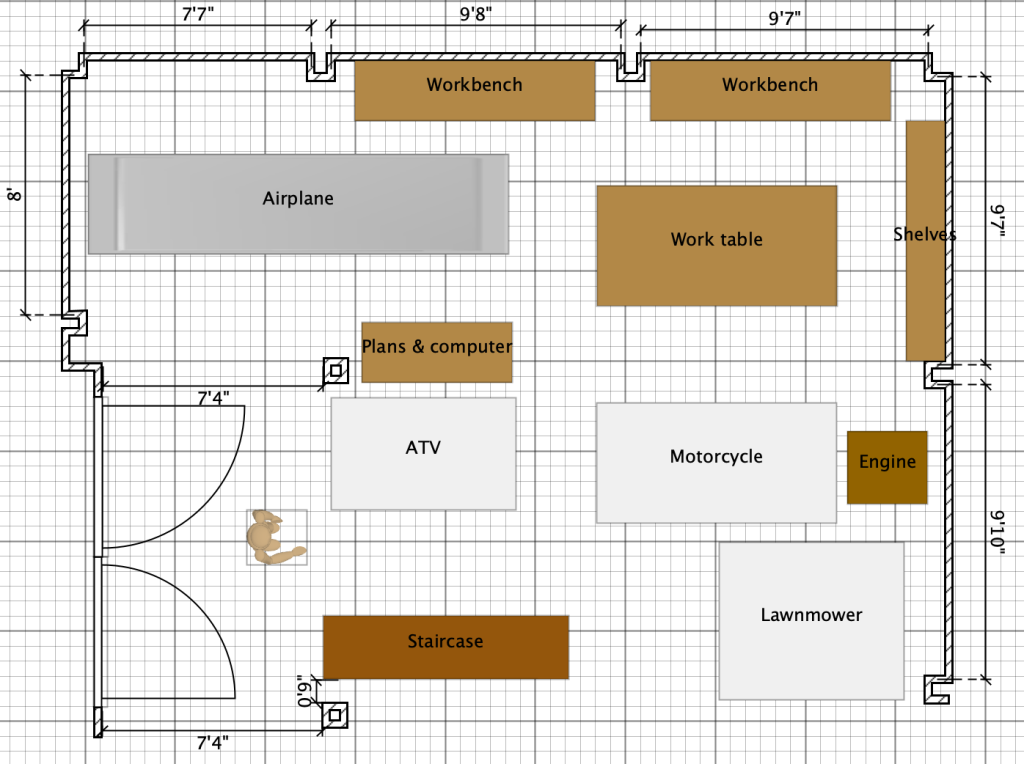
    Sonex recommends a 4 x 12′ (1.2 x 3.6 m) work table, but I will try a 4 x 8′ (1.2 x 4.2 m) table for now. The work benches along the walls will hold power tools and pegboard.

    The garage is unheated so I picked up this nifty Dantherm VA-M35 military diesel tent heater that is rated at 35 kW, much more power than even the main furnace for the house! It should help keep the work area comfortable even in winter when it hits -25 ℃.

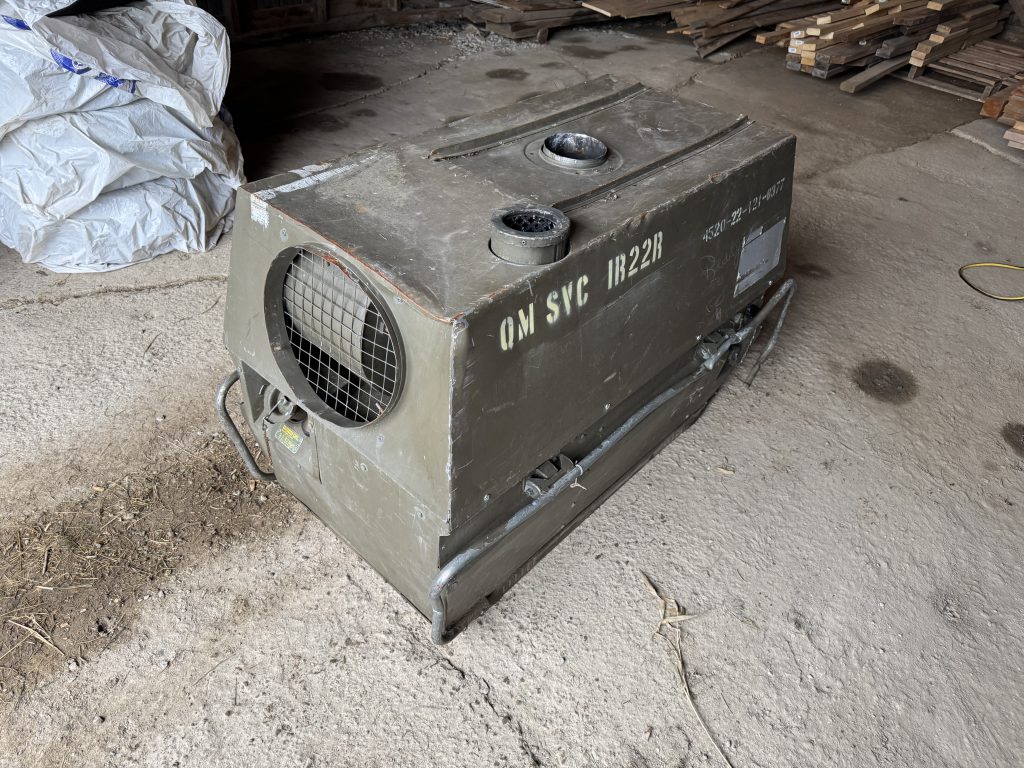
    It was just $200! The fan motor was seized however so I removed it and took it to a local electric motor shop. Otherwise it works quite well, and because it was made in Denmark it even has metric hardware.

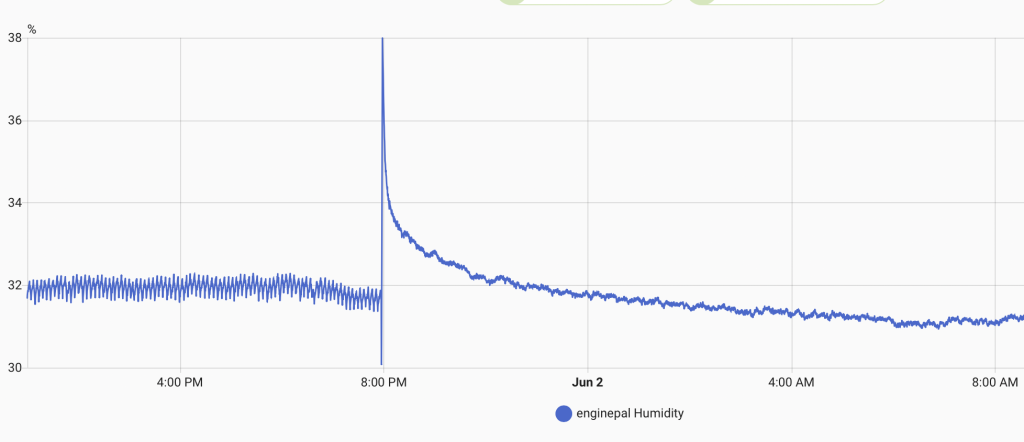
    I was unhappy with the “dehumidifier” as the temperature outside increased, so picked up a very cheap peltier dehumidifier. I would not want to use one of these things to dehumidify a room, but it seems to work well for a small box. It has some digital electronics inside and a 5V supply so I should be able to make it controllable with esphome without much effort, but for now it just runs all the time.

    Engine humidity before and after changing to the peltier dehumidifier.
    The humidifier next to the engine.

    Sifting through the paperwork that came with the plane, I found notes from the previous owner James. He had invested 341 hours over about 2 ¼ years before selling it. Quite a bit of time was spent undoing some of the unsatisfactory work done by the first owner.

    Ending this post with a cat picture.

  • Starting on the workshop

    With my dad in town to lend a hand, we started by building a set of stairs to the second level of the garage, which will be used for storage. Previously I only had a rickety metal ladder. We put hinges on the top of the stairs so they could be hoisted out of the way, to move things in and out more conveniently.

    It gets very humid here in the warm season and I was worried about the engine in its crate. I soldered a spare SHT4x to an ESP32-C3 with esphome and added it into Home Assistant. Relative humidity was about 50 %. The addition of a small heater dropped that to below 40 % in a few minutes. I will monitor it over the next few days as it dries. I also added temperature control so the temperature in the crate does not get too high.

    The Jabiru 3300 in its crate with a little heater, and battery bank-powered esphome sensor.

    Over the next day the humidity dropped to a much more tolerable level, despite heavy rains.

    Most of the work so far has been clearing out all the old clutter and dead projects. A newly available storage space about 800 m down the road will allow me to store wood, the abri-tempo, and other stuff I don’t need very often to clear up space for airplane parts. That shed is missing a wall at the moment.

    I sent my letter of intent to MD-RA officially starting the build in the eyes of Transport Canada, and paid the first government fee of $125+tax.

    Going through the hardware that came with the kit, there seems to be a big mismatch between the hardware I counted and the hardware the plans ask for. There are far too many countersunk driven rivets for example, and I have some bolts that are not in the hardware list at all. There is some hardware missing, including an AN46-7A eye bolt that costs $101.75! Two are needed, good thing I found one.